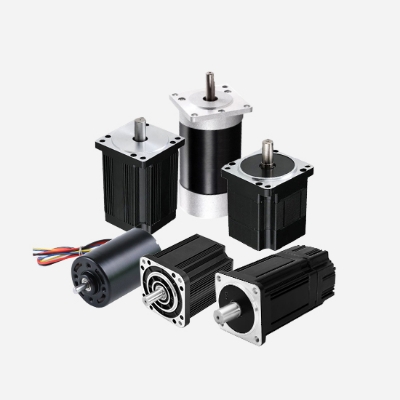
The brushless drone motor, as the power core of drone flight, its stable operation is directly related to the safety and reliability of drone flight. During the use of drones, motor failures occur from time to time. Quickly and accurately troubleshooting and solving these failures is the key for drone operators to ensure the smooth completion of flight missions. Next, this article brushless.com will elaborate on the common failures of brushless drone motors and the corresponding troubleshooting methods in detail.
Motor Fails to Start
When the drone is started, the motor has no reaction at all. It neither rotates nor makes any sound, as if it is in a complete "dormant" state.
Possible Reasons
- Power Supply Problems:
- Insufficient Battery Power: After long - term use or insufficient charging, the battery is depleted and cannot provide sufficient electrical energy for the motor to start. For example, some users do not operate according to the correct charging method when using the battery, and frequently over - discharge it, which shortens the battery life and reduces the actual capacity.
- Poor Battery Connection: Loose interfaces and oxidation are common connection problems. Loose interfaces may be caused by vibrations during flight, and oxidation is due to the long - term exposure of metal interfaces to the air, resulting in corrosion.
- Damaged Power Cord: During flight or handling, the power cord of the drone may be affected by external forces such as extrusion and pulling, resulting in line damage, short - circuit or open - circuit, and then cutting off the power supply to the motor.
- Electronic Speed Controller (ESC) Failures:
- Component Damage: The MOS transistors inside the ESC are prone to breakdown due to overheating or excessive instantaneous current in a high - voltage and high - current working environment. When the drone suddenly encounters strong winds and the motor needs to output a greater torque instantaneously, if the ESC has poor heat dissipation or its own quality is not up to standard, the MOS transistor may be damaged.
- Program Error: When upgrading the ESC program, if the operation is improper, such as sudden power failure during the upgrade process, the program may be interrupted and an error may occur, making the ESC unable to normally control the motor to start. In addition, data errors or losses may also occur in the ESC program during long - term operation, affecting its control function of the motor.
- Motor Failures:
- Winding Short - Circuit or Open - Circuit: Under long - term high - speed operation of the motor, the insulation layer of the windings will gradually age and be damaged, causing the windings to contact each other and form a short - circuit; or due to external forces, the windings may break and cause an open - circuit.
- Bearing Seizure: The motor lacks lubrication for a long time, and the friction between the balls and the raceways inside the bearing increases, which is likely to lead to increased wear and eventually seizure; in addition, in some harsh flight environments, such as areas with a lot of sand and dust, foreign objects enter the inside of the bearing, which can also cause the bearing to seize.
- Flight Control System Failures:
- Component Damage: Electronic components on the flight control board, such as capacitors and resistors, may be damaged due to reasons such as overheating and over - voltage during long - term use, affecting the normal operation of the flight control system.
- Program Error: Logic errors may occur during the operation of the flight control program, resulting in the inability to correctly send start commands to the ESC. This situation may occur when the flight control program is updated and is not compatible with the hardware.
Solutions
- Check the Power Supply:
- Measure the Battery Voltage: Use the DC voltage range of a multimeter to measure the output voltage of the battery, compare it with the rated voltage of the battery, and judge whether the power is sufficient. If the voltage is too low, connect the charger in time for charging. When charging, use a suitable charger and follow the correct charging process.
- Check the Battery Connection: Carefully check the connection part between the battery and the drone to ensure that the plug is inserted tightly and there are no loose signs. For interfaces with oxidation, you can gently polish them with sandpaper to remove the oxide layer, and then re - insert and connect to ensure good contact.
- Check the Power Cord: Check along the direction of the power cord to see if there are any damaged or broken parts.
- Troubleshoot the ESC:
- Update the Program: Use professional ESC debugging tools, connect to a computer, and check if there are available program updates. Follow the prompts of the tool and carefully perform the program update operation to ensure that the power is not interrupted during the update process to avoid program damage.
- Test the ESC: Connect the suspected faulty ESC to a known normal motor, and then send a start command through the flight control system or other control devices. If the motor still does not start, it is very likely that the ESC has failed and a new ESC of the same model needs to be replaced.
- Detect the Motor:
- Measure the Winding Resistance: Use the resistance range of a multimeter to measure the resistance values of the motor windings respectively. Under normal circumstances, the resistance values of each winding should be basically the same and within a certain range. If the measurement results show abnormal resistance values, such as being too small or infinite, it indicates that there are short - circuit or open - circuit problems in the windings, and the motor needs to be repaired or replaced.
- Check the Bearing: Manually rotate the motor shaft to feel whether the rotation is smooth. If there is obvious sticking or resistance during rotation, the bearing may be problematic. You can try to disassemble the motor, clean the bearing, and add an appropriate amount of special lubricating grease; if the bearing is severely damaged, a new bearing needs to be replaced.
- Check the Flight Control:
- Check the Settings: Enter the setting interface of the flight control system, carefully check various parameters, such as motor control parameters and sensor parameters, to ensure that the settings are correct.
- Test the Signal Output: Use flight control debugging software, connect to the flight control system, and check the signal output. You can simulate the start operation and observe whether the signal waveform displayed by the software is normal.
Abnormal Motor Speed
The motor speed is unstable, showing fast - slow fluctuations; or the motor cannot reach the set speed and cannot provide sufficient power support when fast flight or stable hovering is required. When the drone is performing fixed - point hovering shooting, due to the unstable motor speed, the drone shakes and the shooting picture becomes blurred.
Possible Reasons
- ESC Calibration Problems: The ESC needs to be calibrated when it leaves the factory or when a new flight control system is replaced to ensure that it can accurately control the motor speed.
- Sensor Failures:
- Hall Sensor Failure: The Hall sensor is used to detect the position of the motor rotor and provide control signals for the ESC. When the Hall sensor is damaged or malfunctions, it cannot accurately detect the rotor position, and the ESC cannot energize the motor windings in the correct time sequence.
- Current Sensor Failure: The ESC monitors the current size of the motor through the current sensor and adjusts the motor speed accordingly. If the current sensor fails, the ESC cannot accurately obtain the current information of the motor and it is difficult to accurately control the motor speed.
- Electromagnetic Interference: In some areas with complex electromagnetic environments, such as near high - voltage power lines and communication base stations, the signal transmission between the drone motor and the ESC will be strongly interfered by electromagnetic fields.
- Overload:
- Overweight Mounted Equipment: The equipment mounted on the drone exceeds the load capacity of the motor. The motor needs to output a greater torque to maintain flight, which will lead to a decrease in motor speed and even abnormal operation.
- Propeller Problems: Improper propeller installation, such as not being tightened firmly and becoming loose during flight, will cause the propeller to be unbalanced during rotation; or the propeller itself is deformed, which will also increase the load on the motor and make the motor speed unstable.
Solutions
- Re - calibrate the ESC: Strictly follow the ESC instruction manual to perform the calibration operation. Generally, the ESC needs to be connected to the flight control system first, and then through specific operation steps, such as specific button combinations on the remote control, to enter the calibration mode.
- Detect the Sensors:
- Hall Sensor Detection: Use professional Hall sensor detection tools to detect the Hall sensor. Connect the tester to the pins of the Hall sensor, rotate the motor shaft, and observe the display of the tester. If the displayed signal is unstable or does not match the normal situation, the Hall sensor may be damaged.
- Current Sensor Detection: For the current sensor, a multimeter or a special current detection device can be used to detect whether its output signal is normal. When the motor is running, measure the output voltage of the current sensor and compare it with the voltage value during normal operation to judge whether the sensor is faulty.
- Troubleshoot Electromagnetic Interference:
- Change the Flight Site: If abnormal motor speed is found in a certain area and it is suspected to be caused by electromagnetic interference, immediately change the flight site and choose a place far away from strong electromagnetic interference sources for flight.
- Line Shielding Treatment: Shield the line between the motor and the ESC. You can use a cable with a shielding layer or install a magnetic ring on the cable. Ground the shielding layer to reduce the impact of electromagnetic interference on signal transmission.
- Reduce the Load:
- Check the Mounted Equipment: Check the equipment mounted on the drone to understand its weight and power requirements. Ensure that the mounted equipment is within the load range of the motor. If the equipment is too heavy, consider replacing it with a lighter one or reducing the number of mounted equipment.
- Check the Propeller: Check the installation of the propeller to ensure that the propeller is firmly installed and not loose. At the same time, observe whether the propeller is deformed. If the propeller is deformed, replace it with a new one in time.
Motor Overheating
After the motor runs for a period of time, the temperature rises sharply. When touched by hand, it feels very hot, and it may even be possible to smell the odor of the motor's internal insulating materials being heated. When the drone is performing a long - time mapping mission, after continuous flight for several hours, the motor temperature is too high, causing the drone to make an emergency landing and interrupting the mapping work.
Possible Reasons
- Long - term High - load Operation: The drone performs high - load tasks for a long time. For example, during long - time hovering, the motor needs to continuously output a large amount of power to maintain the position of the drone; when flying at high speed, the motor needs to provide greater thrust; when carrying an overweight load, the load on the motor will also increase significantly.
- Poor Heat Dissipation:
- Damaged Heat Sink: The motor's heat sink may be affected by external forces such as collisions and squeezes during transportation, installation, or use, resulting in deformation and damage of the heat sink.
- Cooling Fan Failure: The cooling fan is used to accelerate air flow and take away the heat generated by the motor. If the motor of the cooling fan is damaged and cannot rotate normally, or the fan blades are stuck by dust and debris, the cooling fan will not be able to work normally, affecting the heat dissipation effect.
- Internal Motor Failures: When the motor windings are partially short - circuited, the current will concentrate at the short - circuit site, resulting in an increase in current. According to Joule's law, when the current increases, the generated heat will increase sharply, causing the motor to overheat.
Solutions
- Reasonably Arrange Flight Missions: According to the performance parameters of the drone motor, reasonably plan the flight time and tasks. Avoid long - term high - load operation. During the flight, appropriate rest time can be arranged to allow the motor to have sufficient cooling time.
- Improve Heat Dissipation Conditions:
- Check the Heat Sink: Regularly check the state of the motor heat sink to see if there is any deformation or damage.
- Check the Cooling Fan: Check whether the motor of the cooling fan is operating normally and whether the fan blades are stuck or damaged. At the same time, ensure that the ventilation around the motor is good and avoid any debris blocking the ventilation openings.
- Detect the Motor Windings: Use a multimeter to detect the resistance values of the motor windings to judge whether there are local short - circuit conditions. Measure the resistance between different windings respectively and compare them with the resistance values of a normal motor. If the resistance value of a certain winding is significantly lower than that of other windings or is quite different from the normal range, it indicates that there may be a local short - circuit in this winding, and the motor needs to be repaired or replaced.
Abnormal Motor Noise
When the drone motor is running, it emits abnormal noises such as sharp whistles, metal friction sounds, or irregular "clicking" sounds. In a flight test, after the drone took off, the motor immediately emitted a sharp whistle, and as the flight time increased, the noise became more and more obvious.
Possible Reasons
- Mechanical Component Wear:
- Bearing Wear: During long - term operation of the motor, the balls and raceways of the bearing will gradually wear, and the surface will become rough. When the bearing is worn to a certain extent, friction will occur during rotation, resulting in abnormal noise.
- Gear Wear: If the motor adopts a gear - transmission structure, the long - term meshing of the gears will cause the tooth surfaces to wear and deform. When the gear wear is uneven, impacts and vibrations will occur during rotation, emitting abnormal noises.
- Component Loosening: The installation bolts, nuts and other components of the motor are loose. During the operation of the motor, these loose components will produce vibrations and collisions, making noises. Some internal components of the motor, such as the rotor and stator, if not firmly fixed, will also produce displacements and collisions during operation, emitting abnormal noises.
- Foreign Objects Entering: During flight, the drone may pass through some areas with a lot of dust and debris, and these dust and debris may enter the inside of the motor. The foreign objects will rub and collide with the rotating components inside the motor, producing abnormal noises.
Solutions
- Check the Mechanical Components:
- Check the Bearing: Manually rotate the motor shaft to feel the resistance during rotation and whether there are abnormal vibrations. If the resistance is large or there are obvious vibrations, the bearing may be worn. The motor can be disassembled to check the wear condition of the bearing. If it is severely worn, a new bearing should be replaced in time.
- Check the Gears: For motors with a gear - transmission structure, check whether the tooth surfaces of the gears are worn or deformed. If uneven gear wear or obvious damage is found, new gears need to be replaced. At the same time, ensure that the meshing clearance between the gears is normal, which can be adjusted by adjusting the installation position of the gears or adding gaskets.
- Tighten the Components: Check the installation bolts, nuts and other components of the motor to ensure that they are all tightened. For the loose internal components of the motor, re - fix them. When tightening the components, operate according to the specified torque to avoid over - tightening or under - tightening.
- Clean the Foreign Objects: Remove the motor from the drone and use compressed air or special cleaning tools to clean the dust and debris inside the motor. When cleaning, pay attention not to damage the components of the motor. After cleaning, check the motor to ensure that there is no debris left, and then reinstall it on the drone.
Mastering the common failures and troubleshooting methods of brushless drone motors can help drone users quickly make judgments and solve problems when encountering problems, ensuring the safe flight of drones. In daily use, attention should also be paid to the regular maintenance of the motor, such as regularly cleaning the dust inside and outside the motor, checking the connection of each component, and lubricating the motor, to reduce the probability of failures and extend the service life of the motor.